Eclipse 3.x RCP Tutorial
我们在前面讲Eclipse插件的时候已经说过,Eclipse是一个平台,我们在这个平台上面,可以定制一些插件,从而成我们能够使用的IDE或是其它的产品。
而Eclipse RCP(Rich Client Platform)也是基于Eclipse平台的,它能够使用Eclipse平台中最少的组件去打造我们想要的一个客户端程序,同时这个客户端程序也能够集成其它的Eclipse插件。
RCP与Plug-in
- Eclipse RCP拥有Eclipse Workbench,而Eclipse Plug-in只是Eclipse Workbench上面的一小部分组件。
- Eclipse RCP里面可以安装不同的Eclipse Plug-in。
- 我们平常使用的Eclipse IDE也可以被看作是一个RCP。
RCP
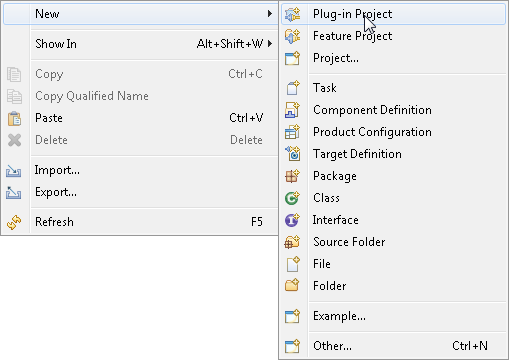
RCP的创建与插件的创建很类似,都需要通过Plug-in Project来完成。
第一步:选择创建插件工程。
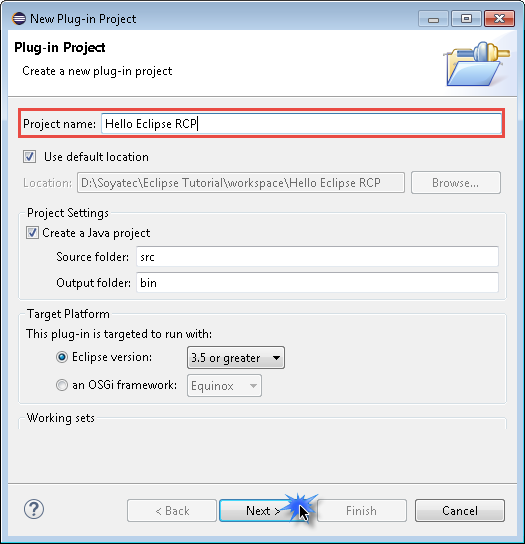
第二步:输入插件工程名称。
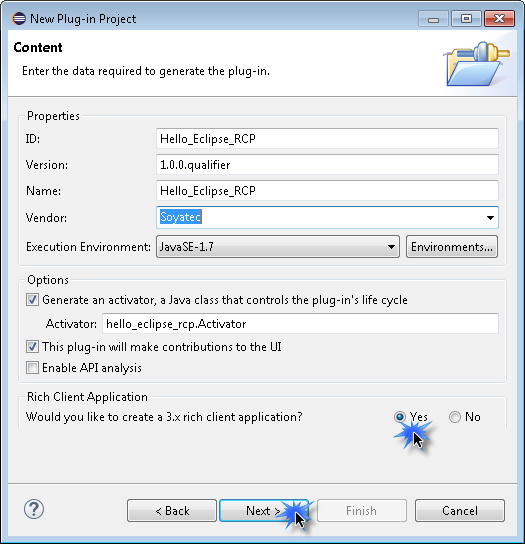
第三步:输入插件描述信息,并在Rich Client Application中选择yes。
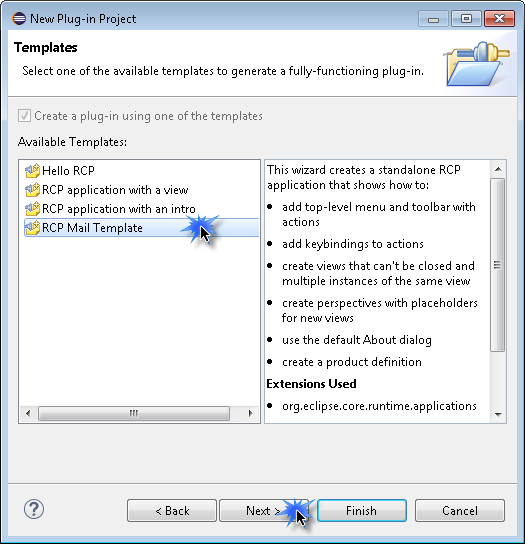
第四步:选择一个RCP模板。
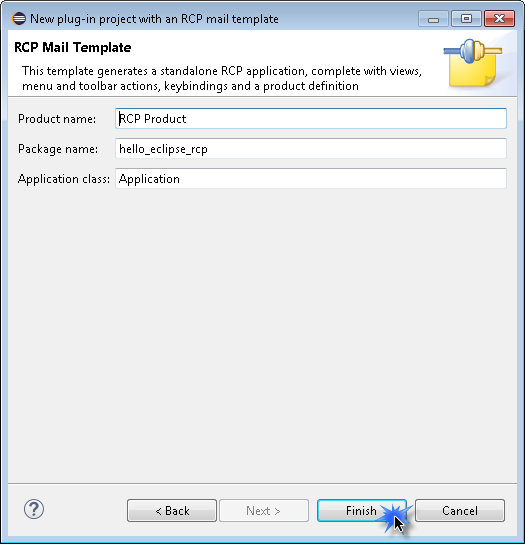
第五步:输入模板信息。
第六步:自动生成基于模板的RCP插件工程。
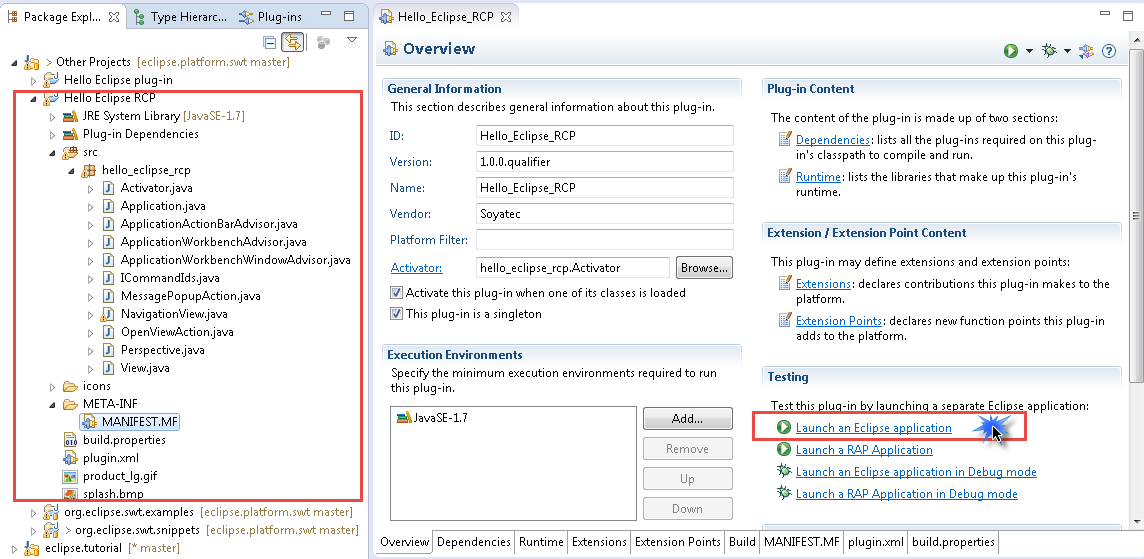
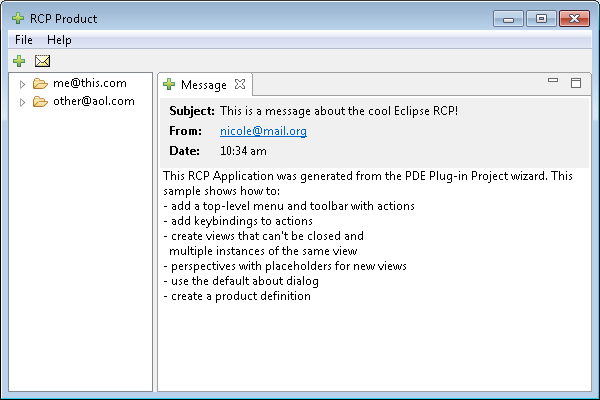
第七步:运行,查看RCP程序。
Application
查看自动生成的RCP代码,你可以发现,在RCP工程的MANIFEST文件中,有一个org.eclipse.core.runtime.applications的扩展。
没错,这个扩展就是Eclipse RCP的入口,他会指定到一个org.eclipse.equinox.app.IApplication接口的实现类中。
Application主要用来负责启动和停止RCP程序。
<extension
     id="application"
     point="org.eclipse.core.runtime.applications">
  <application>
     <run
           class="org.ecsoya.eclipse.tutorial.rcp.Application">
     </run>
  </application>
</extension>
Application类
public class Application implements IApplication {

    public Object start(IApplicationContext context) throws Exception {
        Display display = PlatformUI.createDisplay();
        try {
            int returnCode = PlatformUI.createAndRunWorkbench(display,
                    new ApplicationWorkbenchAdvisor());
            if (returnCode == PlatformUI.RETURN_RESTART)
                return IApplication.EXIT_RESTART;
            else
                return IApplication.EXIT_OK;
            } finally {
            display.dispose();
        }

    }

    public void stop() {
        if (!PlatformUI.isWorkbenchRunning())
            return;
        final IWorkbench workbench = PlatformUI.getWorkbench();
        final Display display = workbench.getDisplay();
        display.syncExec(new Runnable() {
            public void run() {
                if (!display.isDisposed())
                    workbench.close();
            }
        });
    }
}
Advisor Classes
在RCP插件工程中,还相应的生成了几个Advisor类,用来辅助RCP的创建。
WorkbenchAdvisor:主要用来提供默认的Perspective和WorkbenchWindowAdvisor。
public class ApplicationWorkbenchAdvisor extends WorkbenchAdvisor { private static final String PERSPECTIVE_ID = "org.ecsoya.eclipse.tutorial.fragment.perspective"; //$NON-NLS-1$ public WorkbenchWindowAdvisor createWorkbenchWindowAdvisor(IWorkbenchWindowConfigurer configurer) { return new ApplicationWorkbenchWindowAdvisor(configurer); } public String getInitialWindowPerspectiveId() { return PERSPECTIVE_ID; } }WorkbenchWindowAdvisor:用来配置窗口(Window)和ActionBarAdvisor。
public class ApplicationWorkbenchWindowAdvisor extends WorkbenchWindowAdvisor { public ApplicationWorkbenchWindowAdvisor(IWorkbenchWindowConfigurer configurer){ super(configurer); } public ActionBarAdvisor createActionBarAdvisor( IActionBarConfigurer configurer) { return new ApplicationActionBarAdvisor(configurer); } public void preWindowOpen() { IWorkbenchWindowConfigurer configurer = getWindowConfigurer(); configurer.setInitialSize(new Point(400, 300)); configurer.setShowMenuBar(true); configurer.setShowCoolBar(false); configurer.setShowStatusLine(false); configurer.setTitle("Eclipse Fragment Tutorial"); //$NON-NLS-1$ } }ActionBarAdvisor:用来扩展系统菜单和工具栏,跟org.eclipse.ui.menus扩展点类似。
 public class ApplicationActionBarAdvisor extends ActionBarAdvisor {

     public ApplicationActionBarAdvisor(IActionBarConfigurer configurer) {
         super(configurer);
     }

     protected void makeActions(final IWorkbenchWindow window) {
     }

     protected void fillMenuBar(IMenuManager menuBar) {
     }

 }
Eclipse Plug-in
Eclipse RCP中添加插件的方法跟在Eclipse中直接添加插件是一样的,都是通过扩展扩展点来实现。
RCP打包与发布
Eclipse RCP的打包发布与Plug-in的打包发布稍有不同,因为我们发布的是一个用户不用安装就可以直接使用的产品,我们可能还需要对RCP做一些包装或者美化(Branding),这就要用到Product Configuration。
Back to Home 上一篇:Fragment Project Tutorial 下一篇:Product Configuration Tutorial